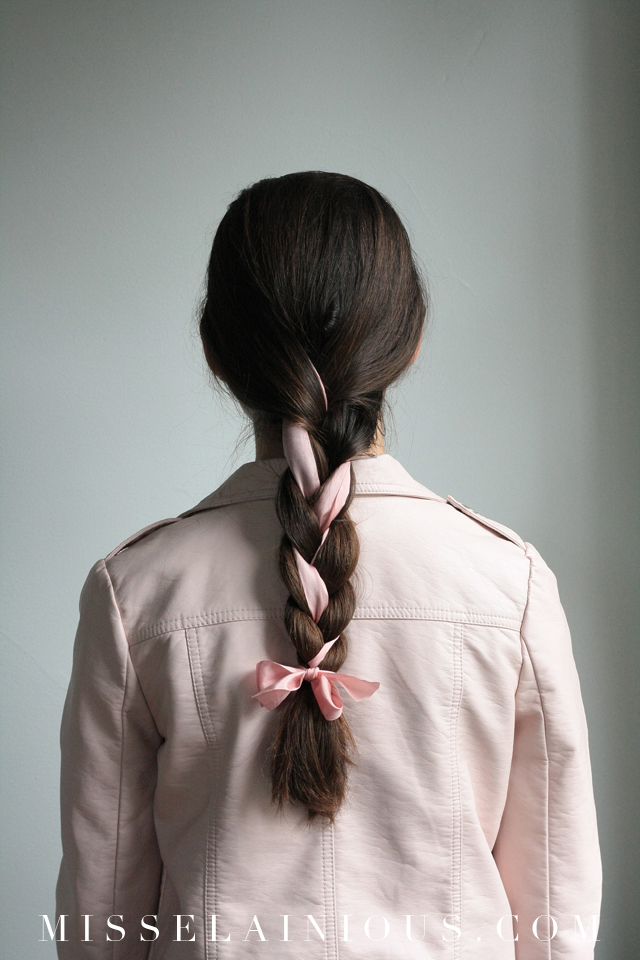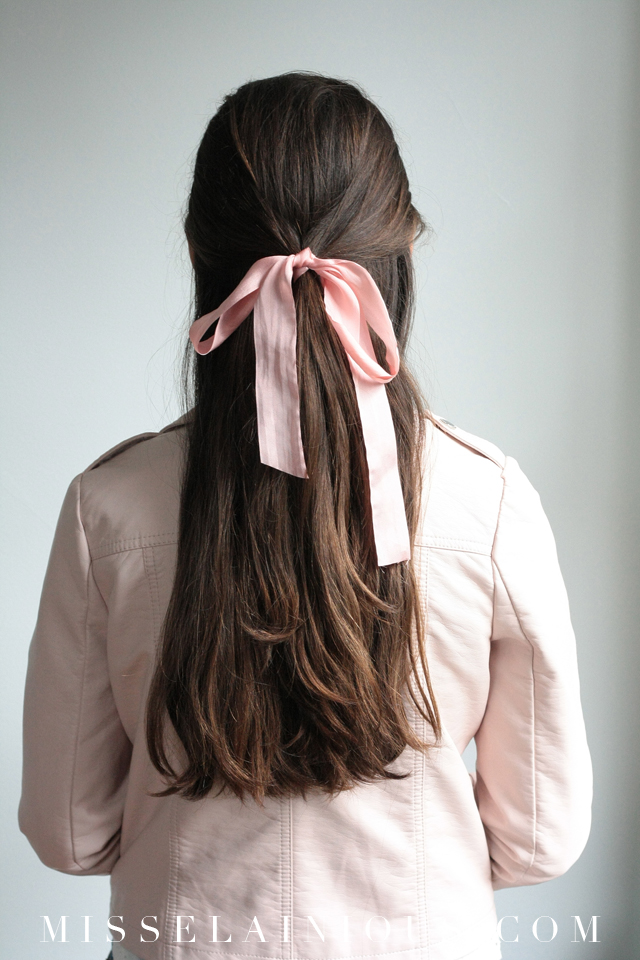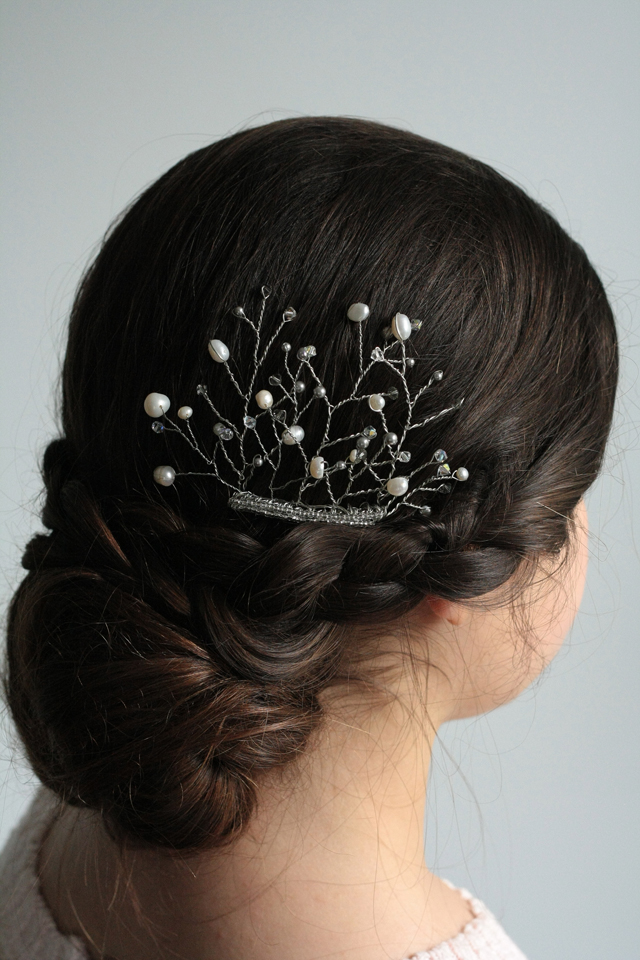
 Today I want to show you how to make this gorgeous Anthropologie inspired hair piece so that you can have something whimsical to add to your hair just because. Or if you have a special event coming up this is just the thing!
Several years ago I had a dream job working for my dear friend who makes the most beautiful pieces of art in the form of veils and hats. She’s a genius at it and she inspires me in so many ways. One of the ways she would inspire me is by allowing me create little things for myself here and there. When you have a huge collection of glittering Swarovski crystal, pearls, buttons, tulle, and feathers it’s like being in a candy store!
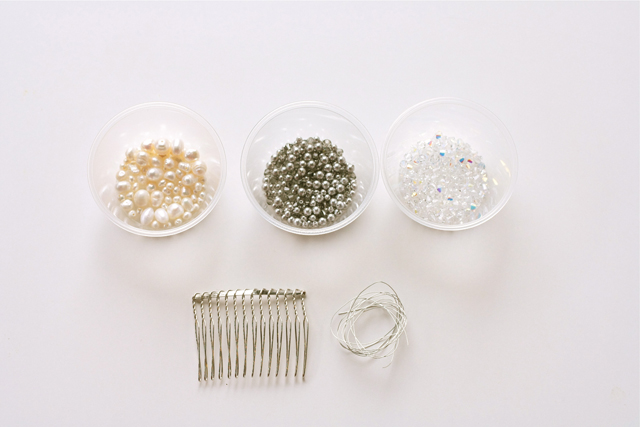
Okay so here’s what you need to make this:
Metal hair comb 2 inches wide (you can find these at Joann craft stores)
Metal wire in the same color as your hair comb (I used 24 gauge wire)
Wire cutters
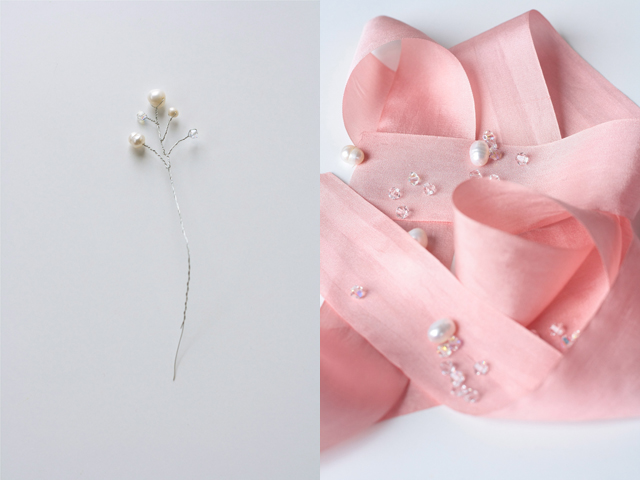
Fresh water pearls in varying sizes
Small sized grey Swarovski pearls
Medium sized grey Swarovski pearls
Small sized cream Swarovski pearls
Medium sized cream Swarovski pearls
Swarovski crystals in clear, aurora borealis (if you want extra color/catching of light), and grey
Silver seed beads
I can’t stress enough that you’ll want to get Swarovski crystals because they sparkle more than any other brand and are very high quality. You should be able to find them at any craft or bead store. They are a little bit expensive but you don’t need very many. I used 47 beads total.
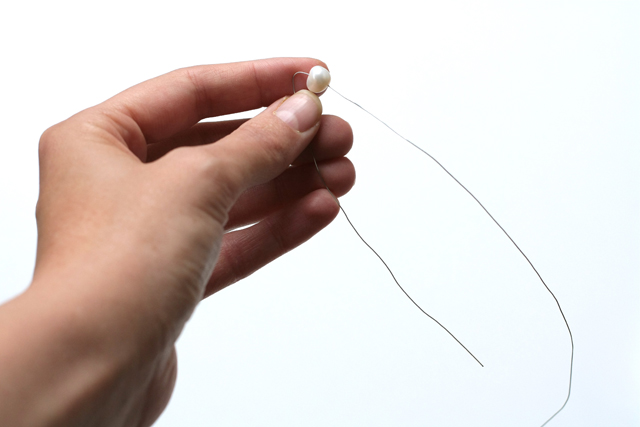
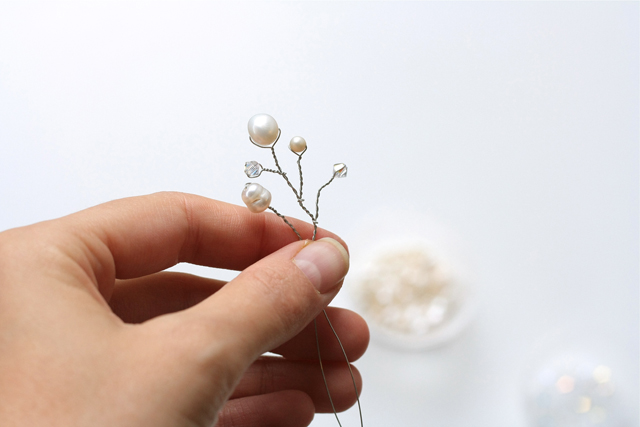
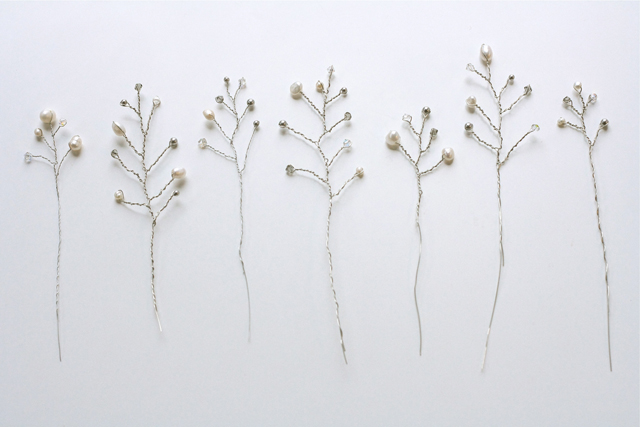
You’re going to make seven “branches” to attach to your comb. First you’ll want to cut seven pieces of wire about 27 inches each in length. For branches 1 and 7 you can cut them a little shorter if you want but I prefer having extra wire versus running out!
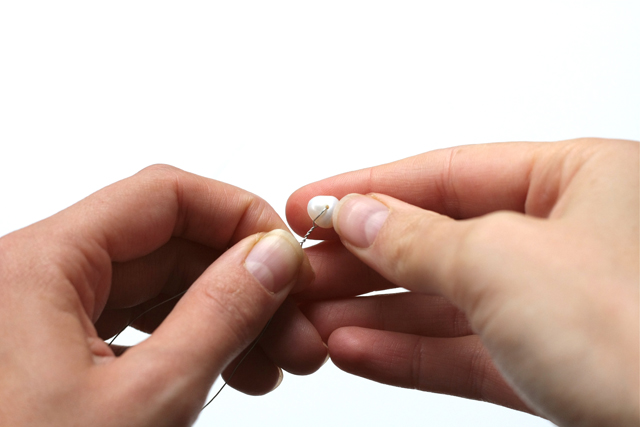
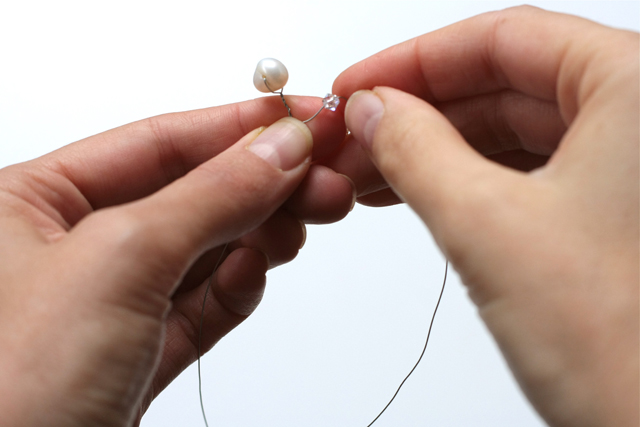
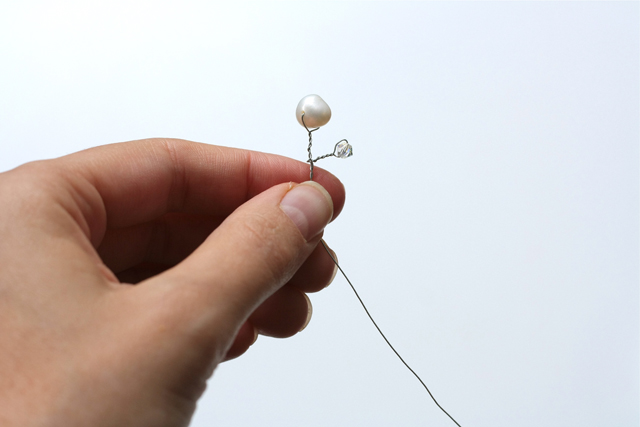
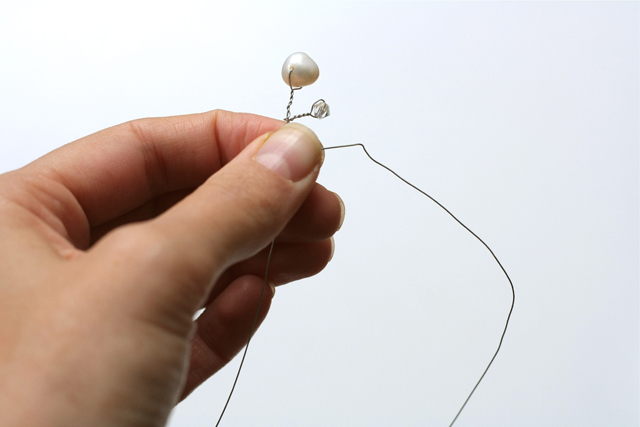
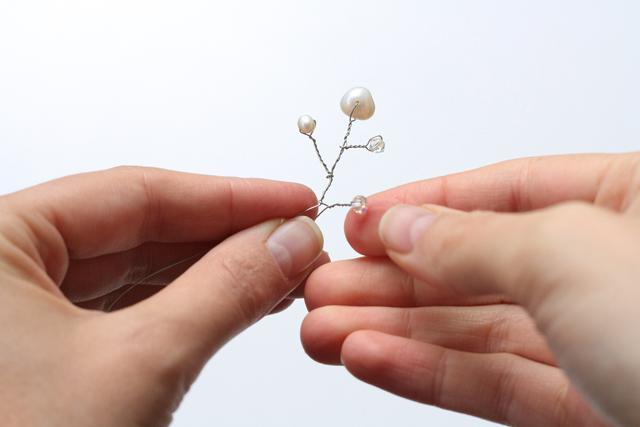
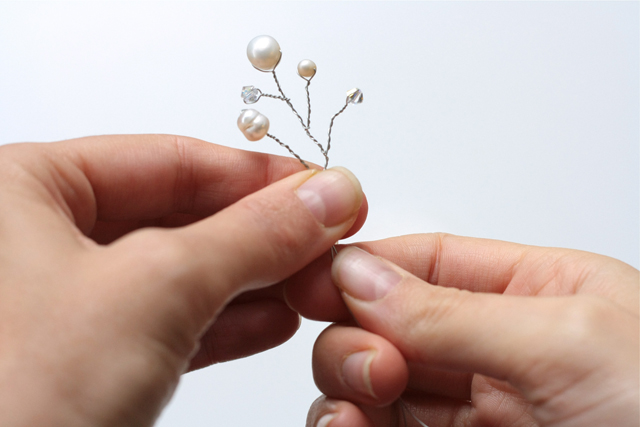
Take your first piece of wire and measure up about 3 1/2 inches and make a little bend in it. Now slide on your first bead and twist the wire together about six times. Take the long end and create another bend in the wire a tiny space away from the twisted stem part and place another bead on. Pinch wire around bead. Now twist that five to six times till you’re back at the stem and then twist the long wire back into the shorter one. After you’ve placed the last bead on and twisted back into the stem just finish by twisting both wires all the way down. You’ll do these steps with each piece of wire until you have all seven branches.
I’ve created a PDF to show you exactly how far I measured and what beads I put where to take the guesswork out of it. You can get the PDF here!
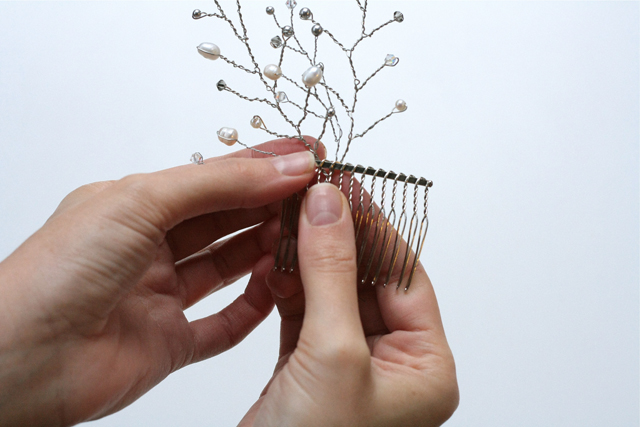
Once you have your seven branches ready you’ll want to take branch number one and start wrapping it through the top part of the metal comb on the left side going towards the right side. Go in between the teeth starting on the backside of the comb. If the stem is too long just trim it before you get to the end of the comb. Take branch number two and space it a little to the right of branch number 1 and repeat wrapping through the teeth of the comb. Keep doing this for branches 3-4. Branch four should be centered right in the middle of your comb. For the next part you’ll want to take branch five and wrap it through the teeth going the opposite direction to the left. Repeat for branches six and seven.
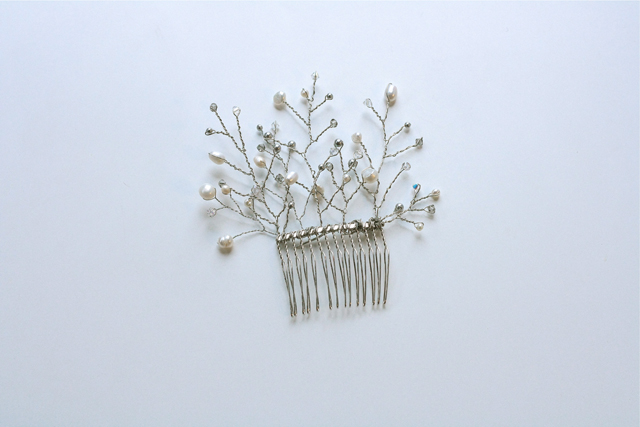
Now that you have all seven branches affixed to the top of the comb you’ll want to cut another piece of wire about 10 inches long. Wrap it around the top part of the comb about three times and then string on your seed beads until you have about 2 inches of beads. Lay that across the top of the comb and wrap the wire again around the top. Now take that wire and string on some more seed beads until you can lay the wire back across the other way. Secure down, tuck in any loose wires so they don’t poke out, and you’re done!
If you have any questions PLEASE let me know in the comments below and I will do my best to answer them! And if you make one I’d love to see it so just use the #misselainiousdiy

 Hello friends! This DIY spray paint plant artwork is sooooooo easy and fun! If you have spray paint and some thick paper on hand it should only take you about ten minutes or less to make. Sometimes you just need to change up the artwork in your frames and you don’t want to spend a fortune, so this is easy and will be one of a kind.
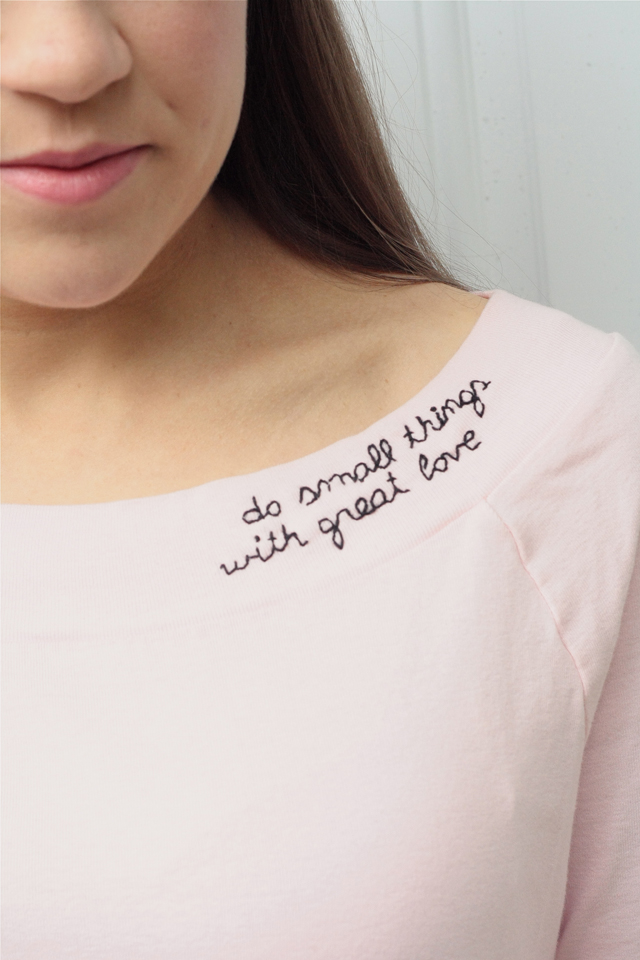 Hello lovely friends! Years ago I saw a picture with a shirt embroidered with this quote and ever since I’ve wanted to make one. I should have done this embroidery a long time ago because it was so easy! So today I’m going to quickly walk you through the steps. I think there’s something delightful about writing words on your clothing that have a special meaning to you. When you walk by a mirror and see it, it’s like a little reminder to make you smile. I especially love this quote “Do small things with great love.” (I can’t find out who it’s actually by…)
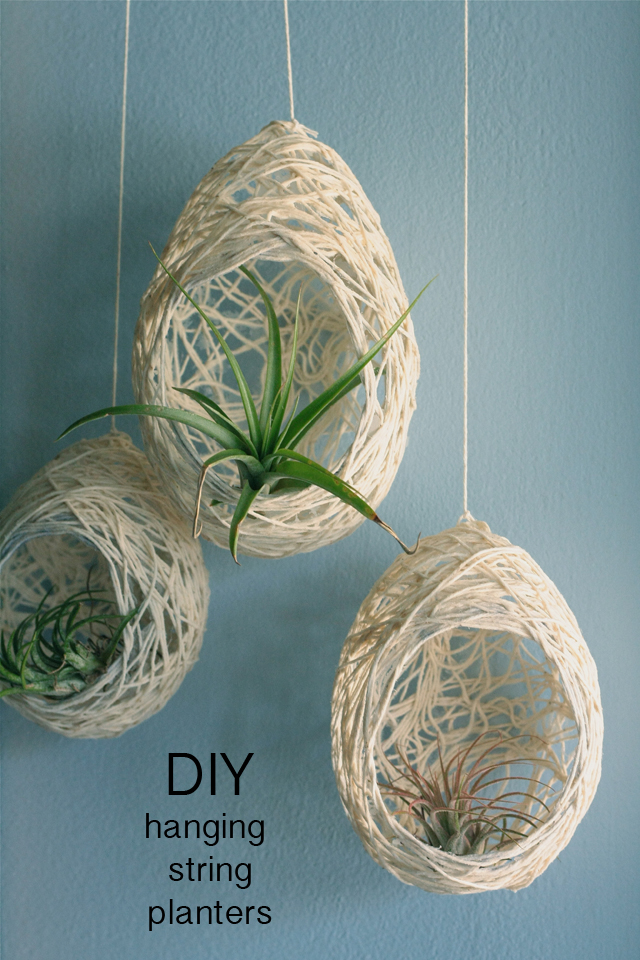
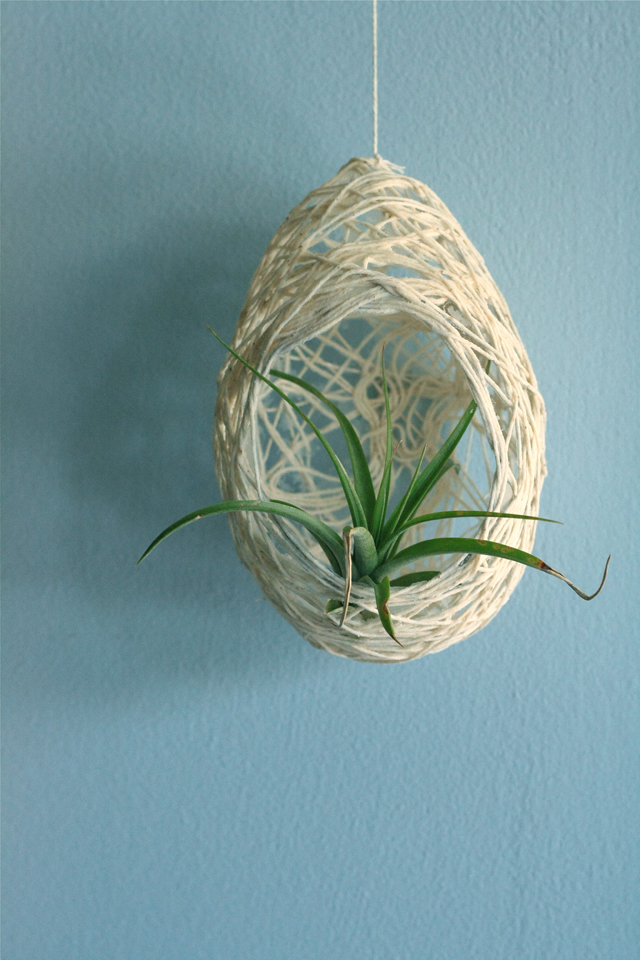
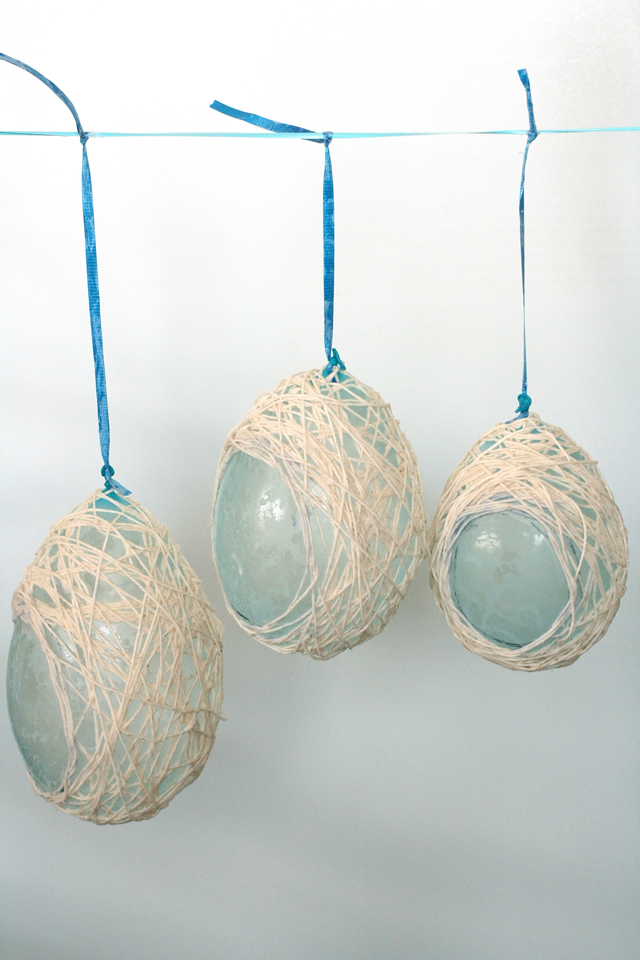 You know that moment when you’re trying to fall asleep but ideas keep bombarding you? Well these DIY string hanging planters are one of those ideas that wouldn’t let me sleep one night. So of course I had to try to make them. I used to have the most gorgeous huge green plant in my room but when we moved it didn’t make it and since then I haven’t had any in my room. Enter air plants.
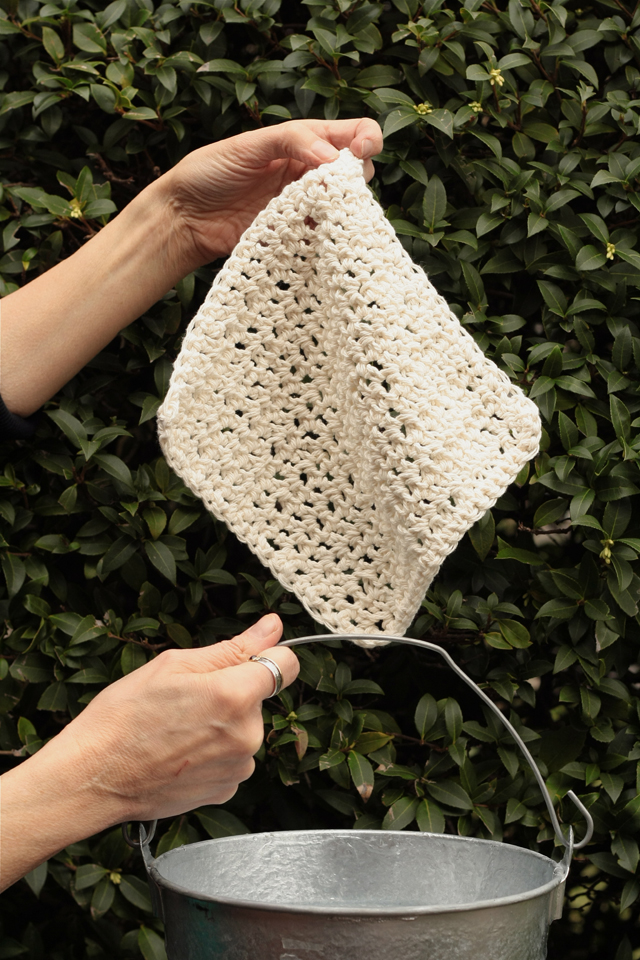
 Last week I needed to make a handmade gift for a special party. Last week I also realized I hadn’t crocheted in years. This DIY crochet cotton washcloth is the easiest and most practical first crochet project though. My mom said as she watched me, “Even I could do that!” and she normally doesn’t like this sort of thing. I was able to whip these out and considering that I haven’t picked up a crochet hook in well over a decade (wow I sound old) I think that’s a good sign for everyone.
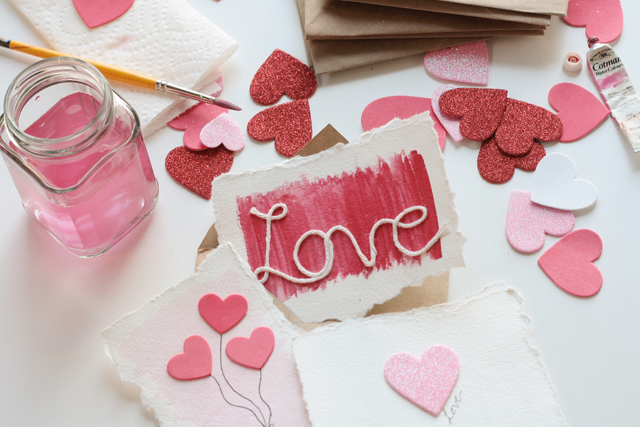
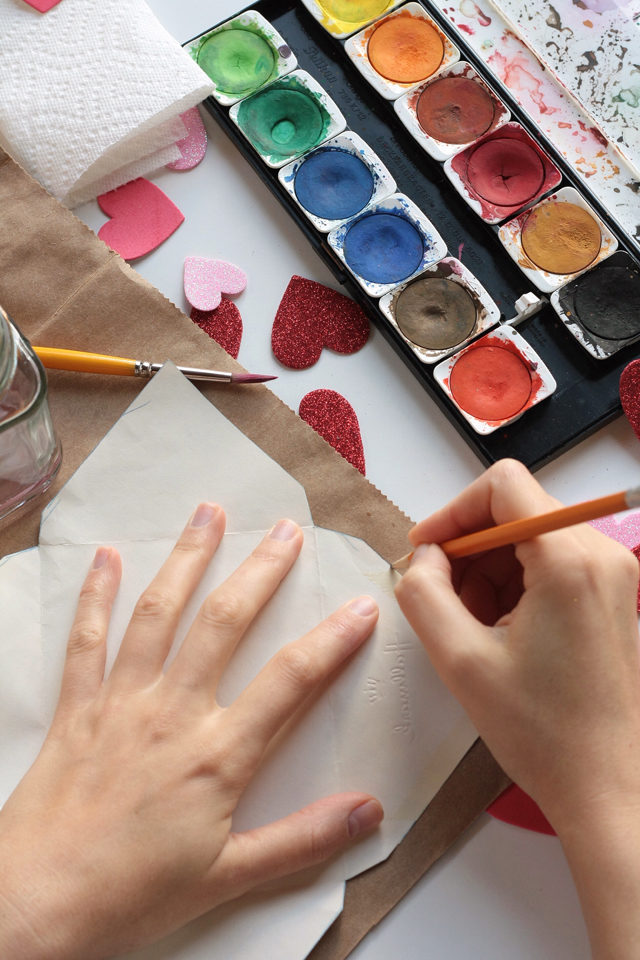
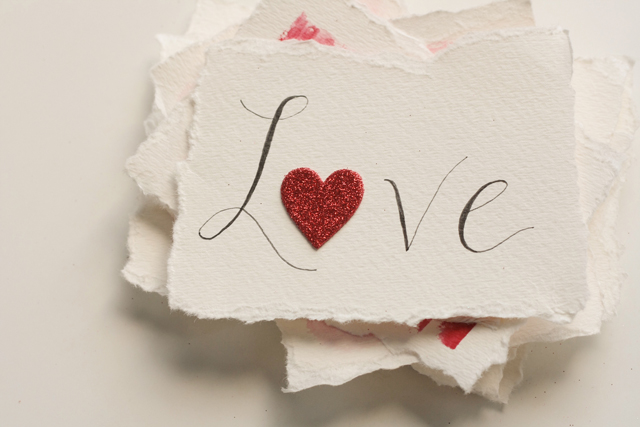
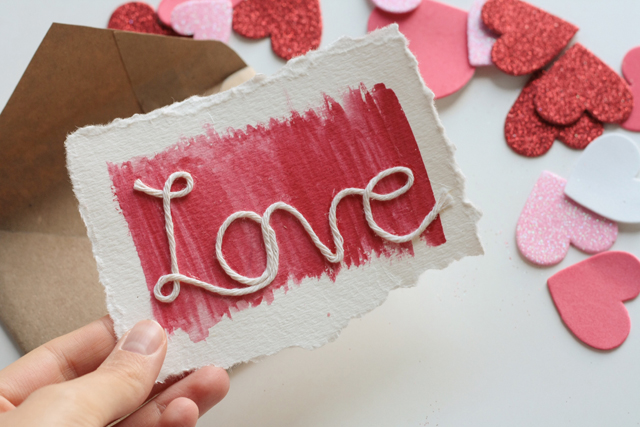
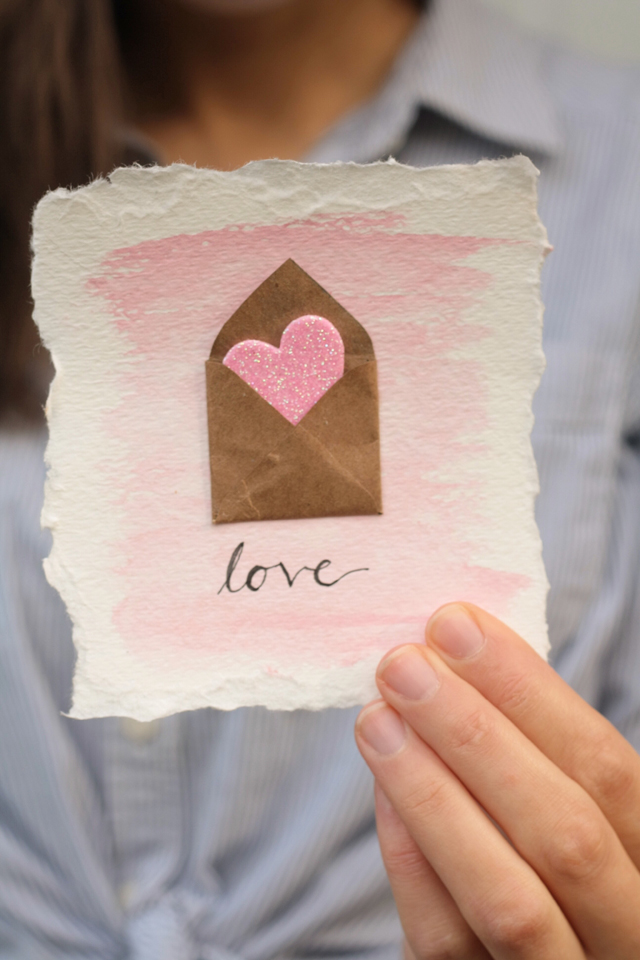
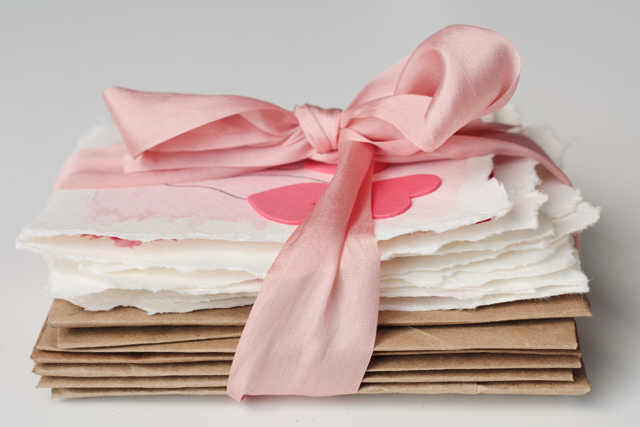
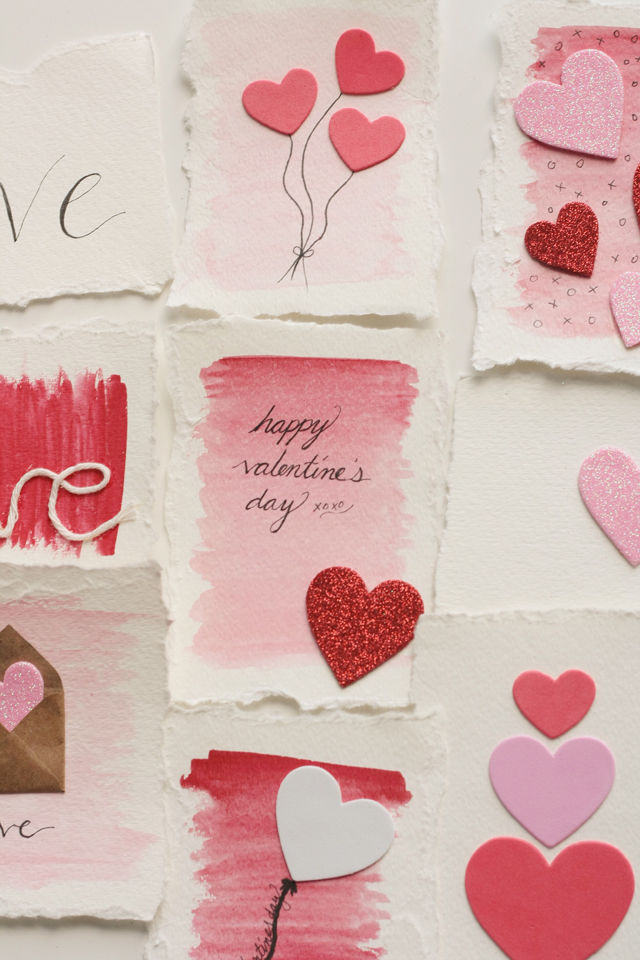 On of the sweetest memories I have with my sister is making Valentine’s Day cards. She would buy all these fancy stickers and shimmery paper in soft pink and vibrant red and who knows what else. We’d spread it out all over the kitchen table and we’d just create to our hearts content. Her’s always looked like a Martha Stewart magazine and I always wanted to copy them but she’d encourage me to come up with my own designs. I remember feeling really happy when she’d comment that she liked mine.